I’m seeing more and more schools with Glowforge (or other) laser cutters in their makerspaces. If your school has one, put your students to work assembling materials for your science class! I’ve been experimenting with some designs of my own, and thought I’d share one here.
Photosynthesis/ Respiration Lesson Plan
The California Academy of Science has a fantastic lesson plan on modeling photosynthesis and respiration for middle school life science and first-year high school biology. It calls for ping-pong ball and egg carton molecules. This design is for wooden molecules and molecule frames instead of ping-pong ball/ egg cartons. They are easier to store and hold up well to handling (and kids are less likely to toss these the way they like to toss the ping-pong balls!). Find the complete lesson plan here:
https://www.calacademy.org/educators/lesson-plans/modelling-photosynthesis-and-cellular-respiration
And download the design for the laser cutter here.
Cutting and Assembly Instructions
You will need the two files in the downloaded Zip folder: “molecules” and “molecule backing.” Each fits on a 12 x 12 inch board, so you will need two 12×12 boards per set.
Items in blue (text) should be engraved. You can speed the cut process by outlining only using the “score” setting on a Glowforge or a “line” setting in Lightburn.
All other colors should be cut.
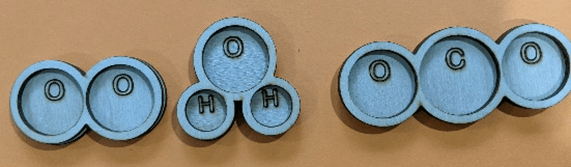
Glue the Atoms
Atoms should be made by gluing two disks with the same letter together.

For example, take 2 carbons (C) and glue them back-to-back so that C can be seen on both sides. The double thickness makes it easy to remove from the molecule frames.
You will notice that there is one extra pair of each molecule in case an atom goes missing over time.
Glue the Molecule Frames
Make molecules by gluing a molecule frame to molecule backing:
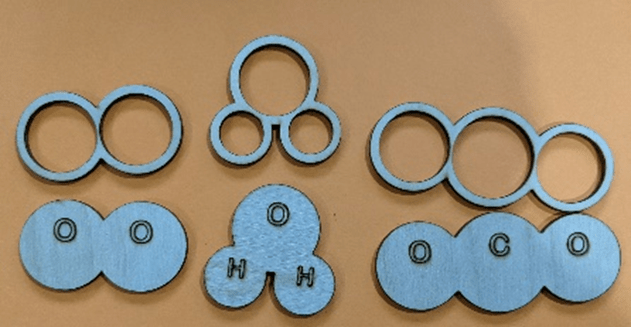
Before Gluing
After Gluing